VIDEO SCRIPT
- Open Modules and search for “Table”
- Drag “Table” from “CC Power Modules” onto the webpage
- Go to the “Table Headers” tab and type in some headers. In this tutorial, we will approximating this other table on this webpage, and copying its information.
- Go back to the General tab. In general, the “sortable” and “scrollable table” options are effectively needless. Select the “No” swatch for both.
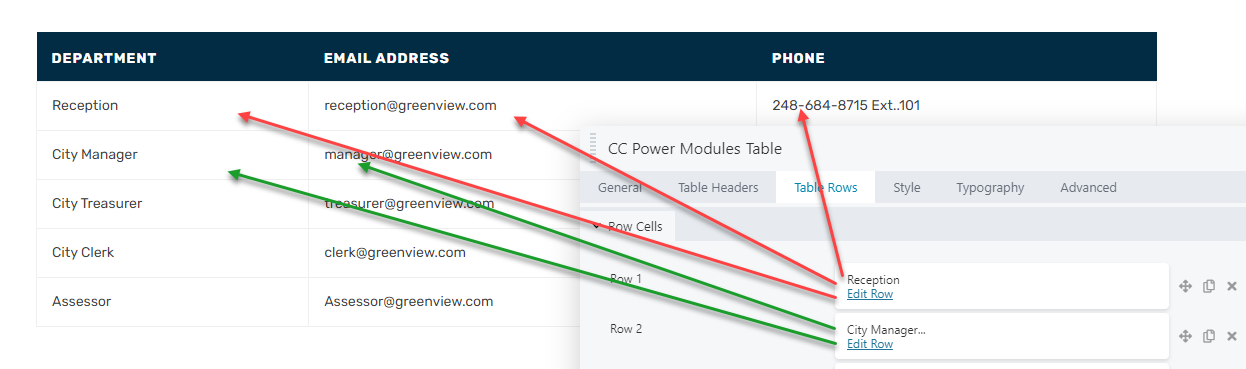
- Go to the “Table Rows” tab. Click “Edit Row” under “Row 1.”
- Click “Add Cell” until there are as many cells as headers. (In this case, 3)
- Cells are arrayed in rows from left to right. Cell 1 is the first column, Cell 2 in the second, and so on.
- Fill in “Row Label” with what information was put in Cell 1
- Add more rows as more information is necessary.
- On the “style” tab, go to the “Header” dropdown menu, which may be open by default, and change the background color.
- On the “typography” tab, go to the “Header” dropdown menu, which may be open by default, and open the “Font” dropdown menu. Change the font to “bold.”
- Make sure to also change the Text Color to something legible on a transparent or white background.
SCREEN SHOTS
Table Headers
Table Rows
Each row contains all the cells for that row. Easiest to understand when creating and editing.